Lesson 4
The diagram below shows how to highlight and find Paint.
Click the ‘start’ button. Select Programs, hover the mouse and do not let anything slip shut, select Accessories, select Paint. Left click Paint.

Click
individual
images to
enlarge
Figure 22
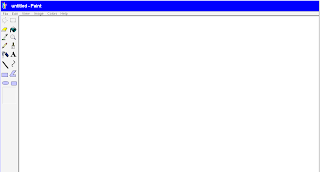
When Paint opens it will look something like this.

Fig 23
Click ‘File’ in the top left hand corner.
A drop-down box will appear.

Fig 24

Fig 25
Highlight ‘Open’ and click left mouse button.

Fig 26
Scroll down
If ‘My Documents’ or another file appears in the top text box.
(See brown arrow in diagram above)...

Fig 27
Click on the small square which shows a small black triangle pointing downwards.
See green arrow in diagram above.
The drop-down box will show various choices which are contained within the ‘My Documents’ file.
Choose and select ‘My Pictures’

Fig 28
Select ‘My Pictures’ and click ‘Open’
(in the bottom right hand corner)

Fig 29
Turquoise arrow shows the ‘Open’ button.
Find the folder, made in ‘Lesson 3’.
Highlight and left click mouse button to open it.
Select the required picture.
Use Paint to edit photographs

Fig 30
The original photograph in ‘I found a galah’ showed two galahs.(See fig 30).
To use this photograph, with the words ‘I found a galah’, would be inaccurate and confusing to small children who are in the early stages of acquiring literacy and nummeracy.

Fig 31
Therefore,
the photograph
had to be re-touched.
(See fig 31)
Photographs can be turned into drawings or edited in many different ways using Microsoft Paint.
There was a thin white line around these birds which means that it has already been retouched. It was found in Google Images(2008). Before starting to retouch or alter an image, always remember to copy it first. This will save the expense of having to download it again.
Students might also photograph animals and birds, using a conventional camera, scan images to the computer, or use a digital or a mobile phone camera and upload them.
It is often difficult to photograph animals and birds in their natural environment.
The internet is always a good source of images but it should be remembered that it contains many pictures of creatures which are not native to Australia and when a describing particular species, careful attention should be paid to the location and habitat.
The large photograph (Galah) below has been saved in a different file format, as a ‘gif’ rather than a ‘jpeg’ file. This makes it smaller (in terms of Kilobytes) but destroys some of it’s clarity.

Fig 32

Fig 33

Fig 34
The original photograph of the Sulphur Crested Cockatoo (Google Images:2008) has a mess of dots and of pixels around it. This problem could be overcome by retouching it, setting it on a new background or rendering it as a line-drawing illustration.
Copy the finished image by selecting it.
Fig 35
See red arrow in diagram (left).
Stretch a dashed line around the area required.
Right click mouse button and a drop-down box will appear.
See diagram below

Fig 36
On the drop-down list, select ‘Copy’ by left-clicking the mouse button.
Paste the image into Microsoft PowerPoint.
Arrange and prepare text and pictures for the story in PowerPoint.
About five or six pages will be needed.
Return to Index Page